Fix Bluetooth Device Remove Failed on Windows 10/11
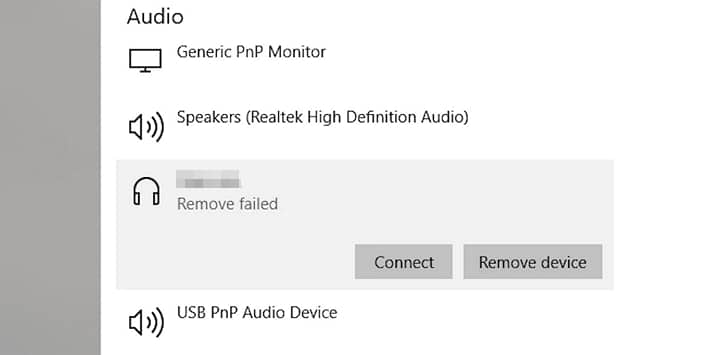
Recently, a lot of users have reported that they are getting Bluetooth device remove failed error when trying to remove a paired Bluetooth device (mostly audio/controller devices).
So if you are in same situation where you are unable to remove a Bluetooth device and want a solution, then don’t worry. In this guide, you will learn how to remove a Bluetooth device that gives “Remove failed” error in Windows 10 or 11.
How to Fix – Bluetooth device remove failed
Since there are several ways to solve this issue. I have listed them one by one. So you can take your time and follow the steps to remove your Bluetooth device properly.
Note: Before proceeding any of these methods, turn the Bluetooth device you want to remove off for better results.
01 – Remove Bluetooth device from device manager
Device manager is the central control panel of all the devices connected to your PC. So you can go directly to device manger and remove the device.
Follow the steps below;
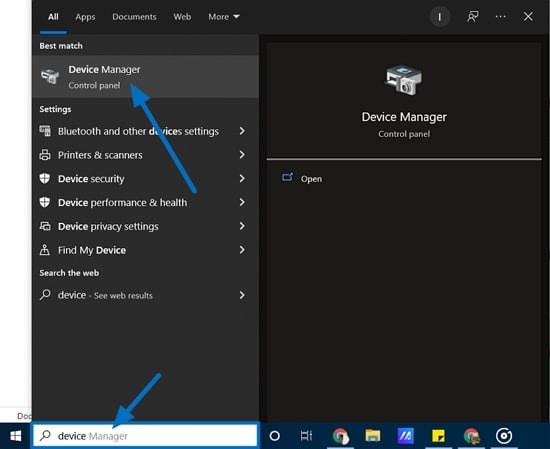
- Type device manager on the search bar and open up the Device Manager
- Click the View tab and select Show hidden devices
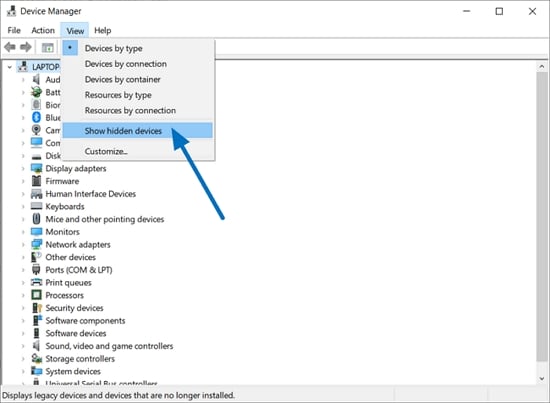
- Now double click on Bluetooth to view the list of devices connected to your Windows PC
- Right click on the device you want to remove. Then select Uninstall
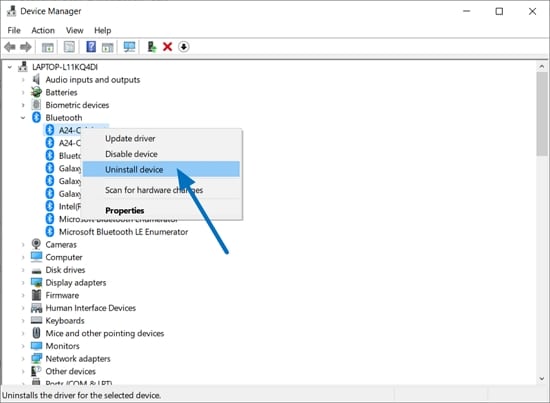
- You will be asked to confirm the uninstallation, go ahead and click on the Uninstall button
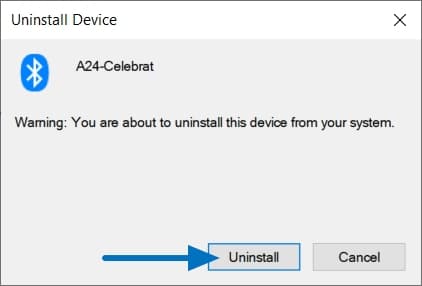
After uninstallation, check if the “Remove failed” error appear again. If this method does not work, don’t worry. There are other ways to do that, keep scrolling..
02. Turn on Airplane mode and remove the Bluetooth device
This might sound silly but turning on airplane mode will Disable Bluetooth function and other signal transmissions including WIFI.
This will let you to remove your Bluetooth device from the PC without any failure. So let’s try that out.
- Click on the notification icon on taskbar

- Turn on Airplane mode
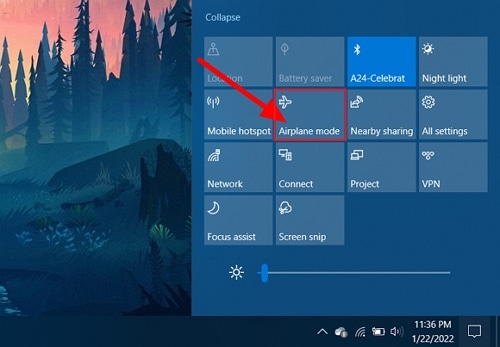
- Now try to remove the Bluetooth device
If you are still getting Bluetooth device remove failed error, try the below method as well.
03. Use Bluetooth Command line tools
According it its developers – Bluetooth command line tools are a suite of command line utilities for Microsoft Windows that can be used to configure your Bluetooth adapter.
You can use this 3rd party utility to fix the issue. So here is how to do that;
Note: This tool is not yet tested on a Windows 11 PC. Currently it supports Windows 7/8 and 10. Leave a comment below if this method works so it will be helpful to others.
- Download Bluetooth command line tools from here
- Install the package (follow the given instructions on download’s page)
- Now turn on your Bluetooth device and switch to pairing mode
- Type PowerShell on the search bar and open Windows PowerShell
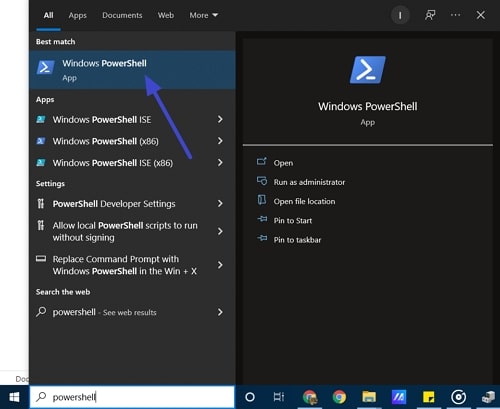
- Copy the below command to PowerShell and press the Enter button:
btpair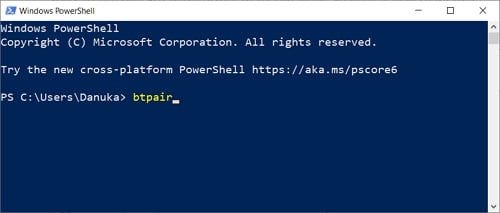
- Now you will be asked by a prompt to allow to pair your device.
04. Use Windows Registry Editor to remove the device
Note: Turn off the Bluetooth device before proceeding.
Whenever you pair a device with Windows PC, the system will automatically creates a registry entry in Windows Registry Editor.
So if you are unable to remove a Bluetooth device, you can remove it from Windows Registry editor and get rid of Bluetooth device remove failed error. Let’s see how you can do it;
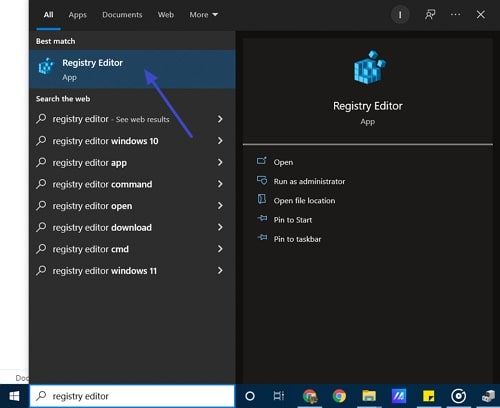
- Type registry editor in Windows search and open it
- Go to the following path;
Computer\HKEY_LOCAL_MACHINE\SYSTEM\CurrentControlSet\Services\BTHPORT\Parameters\DevicesNote: If you find it difficult to navigate to this registry, just copy the above path, paste it in the address bar and press the Enter button to go directly to the registry easily.
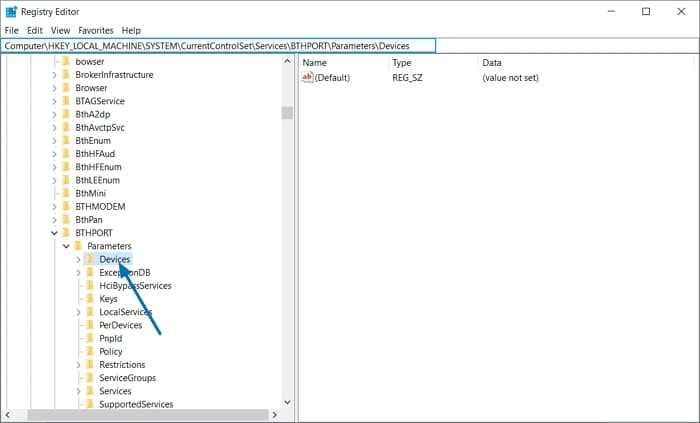
- Double click the Device folder (registry) you will see one or many subfolders (keys). Each subfolder (key) belongs to a Bluetooth device which have paired with your PC
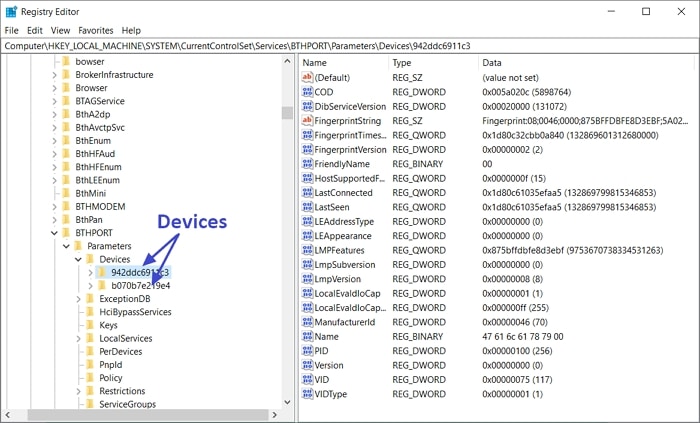
- Now click on each subfolder (key) and open the name value from the right pane to identify which device it belongs to.
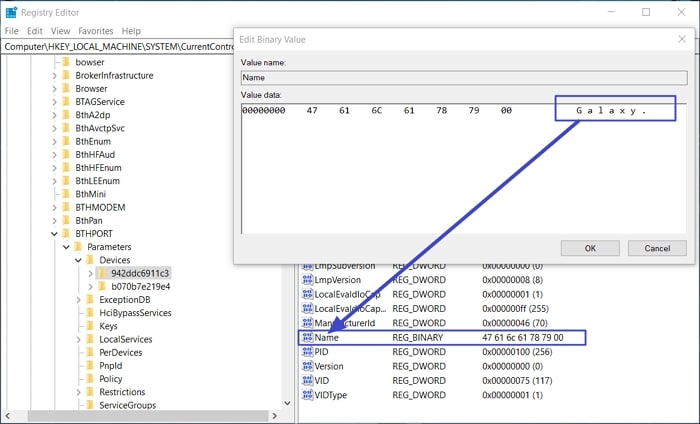
- When you find the device you want to remove, delete the subfolder (key) it belongs to
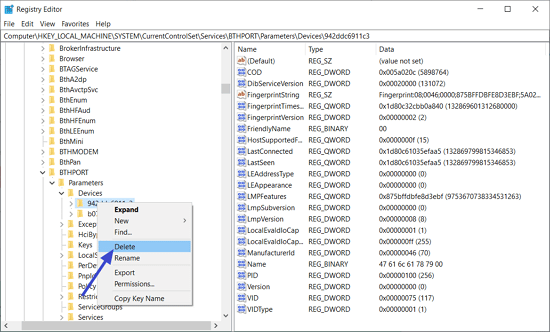
- Restart your PC and see if the problem is solved
05. Run Bluetooth troubleshooter
Windows 10/11 comes with many built in troubleshooters which can help you to fix various issues. Bluetooth troubleshooter is one of them
You can use Bluetooth troubleshooter to remove or fix the Bluetooth device you want. Here is how to do that;
- Go to settings and then Update & security
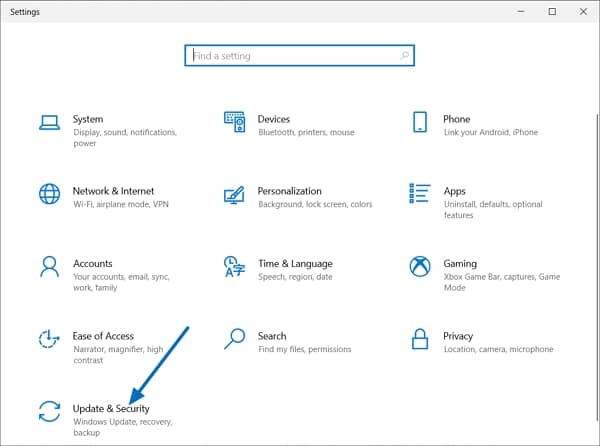
- from the right side select Troubleshoot
- A list of troubleshooters will appear now, if not scroll to bottom and click Additional troubleshooters

- From the list, click on Bluetooth and then click the Run the troubleshooter button
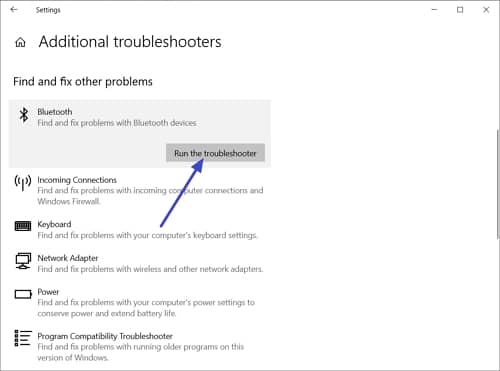
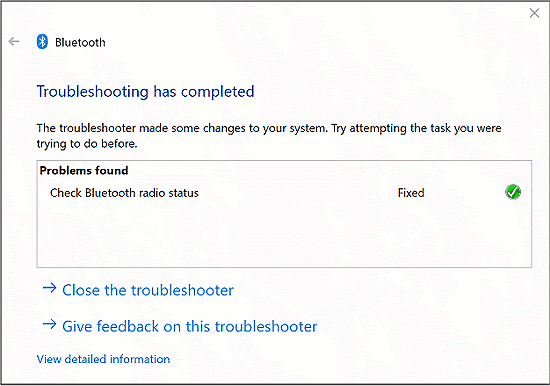
Now the troubleshooter will run and find problems with your Bluetooth devices, it will also fix if there is any issue automatically and you can see it after it completes the troubleshooting. Like this:
06. Remove the device in Safe mode
When boot your Windows PC into Safe mode, some services, device drivers and other 3rd party programs will not load. So you can troubleshoot issues without any interferences.
So first you have to Boot into safe mode, and then you can remove the Bluetooth device from your PC.
Take a photo or load this article from another device before proceeding. Because once you boot into safe mode, you might not be able to visit any webpage.
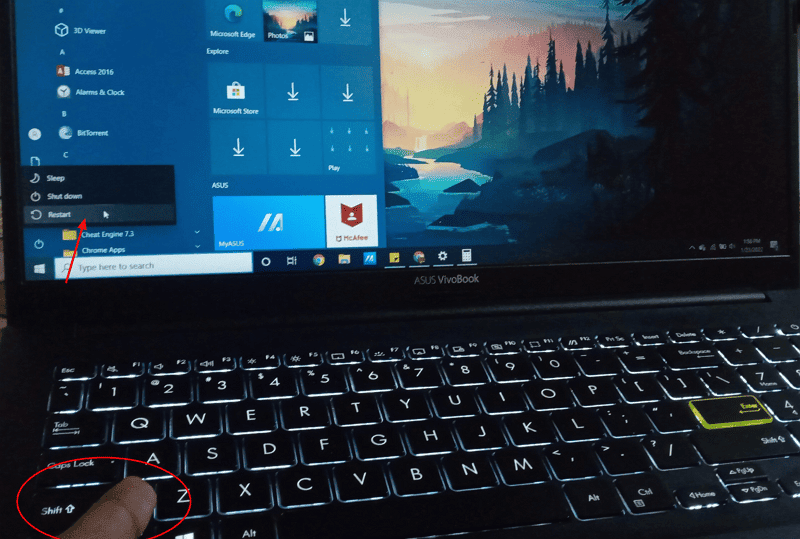
- While pressing the Shift button on the keyboard, click on Start button, power and then click on Restart
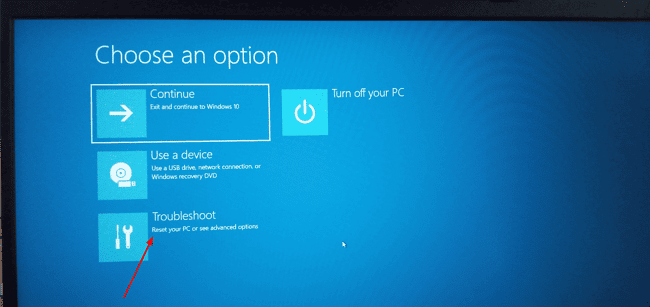
- After restart, you will see a blue screen and click the Troubleshoot from there
- Then click on Advanced options
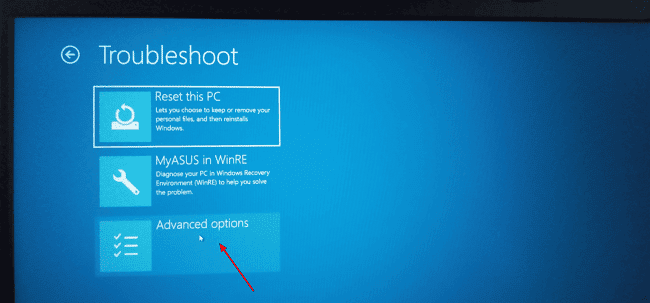
- You will see few Advanced options in there. Click on Startup settings
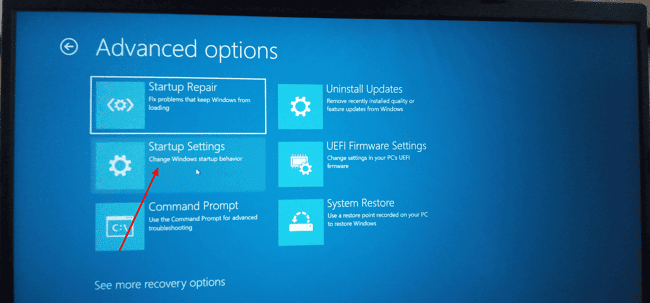
- Now click on Restart
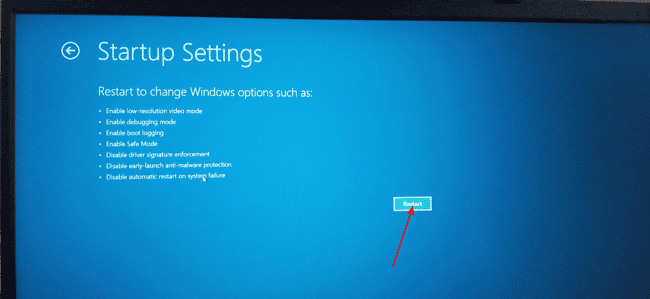
- After restart Press 4 or F4 button on your keyboard to Enable/ Boot into safe mode
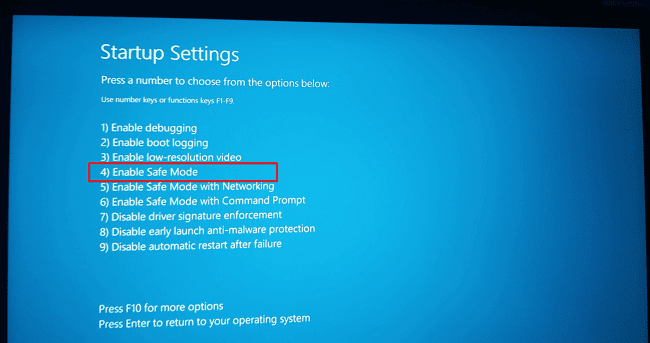
Note: If you have enabled BitLocker or Device Encryption in your Windows PC, after restart you will be asked for a BitLocker recovery key. You have to enter it before accessing Startup settings. Click here to get your BitLocker recovery key.
Once successfully boot into safe mode, follow these steps to remove Bluetooth adapter.
- Type device manager in Search bar and open the Device manager
- Once opened, double click on Bluetooth
- From the list, select your Bluetooth adapter and uninstall it (It will get installed again after restart so no need to panic)
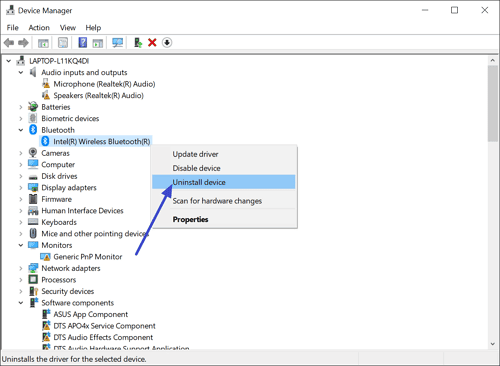
- Restart your PC
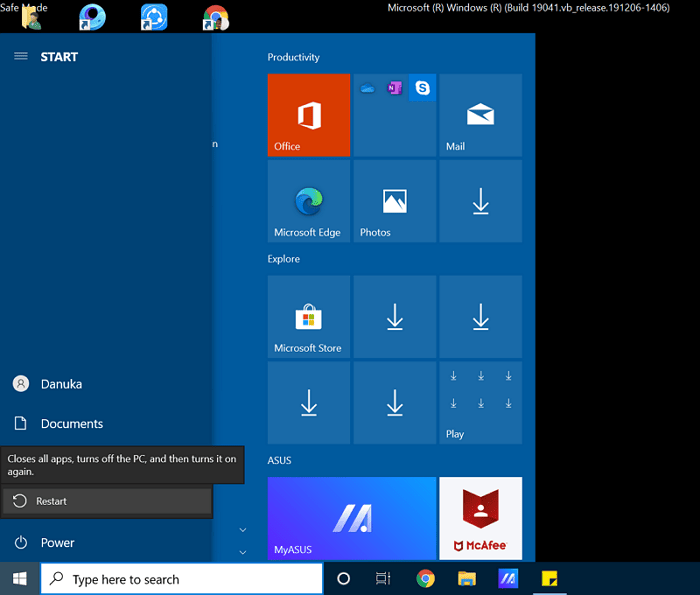
After the restart, Windows will automatically install the Bluetooth adapter and all the paired devices will be erased. Now you can check whether the problem is solved and pair your devices once again.
07. Update Bluetooth drivers to latest version
If you still gets the Bluetooth device remove failed error, then you should update your Bluetooth adapter’s driver.
There are several ways to update drivers, I will show you the easiest way. Which is using a reliable third party Driver update software.
The program I use in this guide is IObit Driver booster. If you know another software which can do the job then you can go with that software and update Bluetooth drivers.
- Go to Driver Booster download page
- Download and install Driver booster
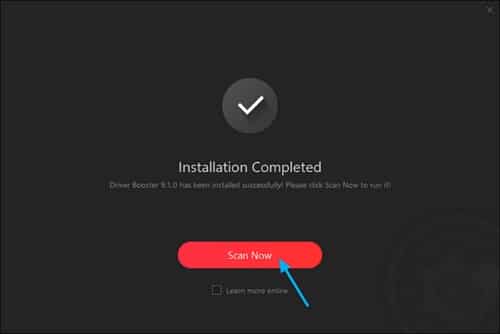
- After install the program, click on Scan now
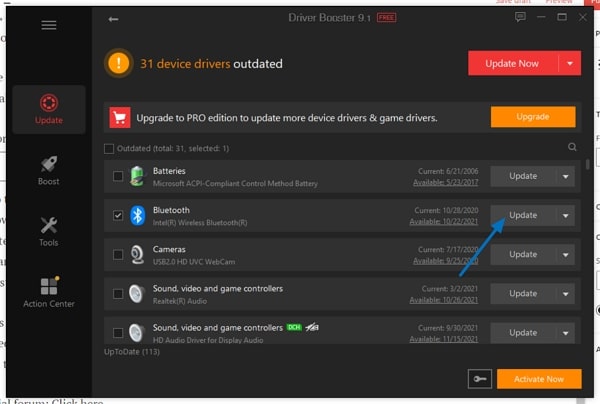
- If an update available for your Bluetooth adapter, click on update
- Restart your PC
That’s it. Now I hope you solved the Bluetooth device remove failed error. Which method worked for you? Do you have any questions? leave a comment below. I will always be there to help you.
Official forum: Click here
Related:
How to STOP Auto updates (Permanently) in Windows 10
How to Check Windows 10 Crash Logs & Fix Errors in 2022