How to Delete Files Permanently in Windows (2021)

There are 2 ways you can permanently delete files from your Windows (10, 8, 7) computer. One is to delete the files and remove them from the recycle bin, and the other way is to permanently delete files from your computer using a third party shredder software.
Deleting a file in Windows is different from what you think.
If you delete a file from your computer and even you empty the recycle bin, the file will not be deleted permanently. Instead, the file’s address or its cluster location will only be deleted and until new data is replaced in that cluster, your file will remain there.
This is the reason why you need to remove the file from its cluster by replacing new data in order to prevent the file from recovering. Mainly, this is where the second method comes in.
Still, it is up to you to decide whether you want to delete files from the recycle bin or delete files permanently from the storage drive (Hard disk/SSD/Nvme or USB). If you already have some files that are very personal to you, then it is better to remove them permanently from your computer.
To make it easier, this article will explain to you both ways. Let us start with how to delete files permanently using a third party software.
How to delete files permanently using a third party software
There are plenty of software out there that you can use to completely erase files. While some of these are not free to use, there are also some free software that can do the job you want without the need to pay for it. Eraser is one of those software that is free to use without any restrictions; what’s best is that the developers are kind enough to update the software frequently.
How to use Eraser to remove files permanently
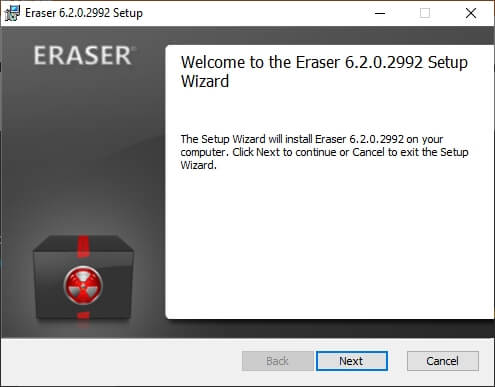
As the first step, download Eraser from here and install (download the latest version). After that, proceed to the following instructions to permanently remove whatever you want from your computer.
You can delete files for good with the use of Eraser in two different ways. First is by deleting files using its windows and the other one is deleting files by right clicking on them. Let’s get to know its easy way.
Method 01: Delete files permanently by right clicking on each file
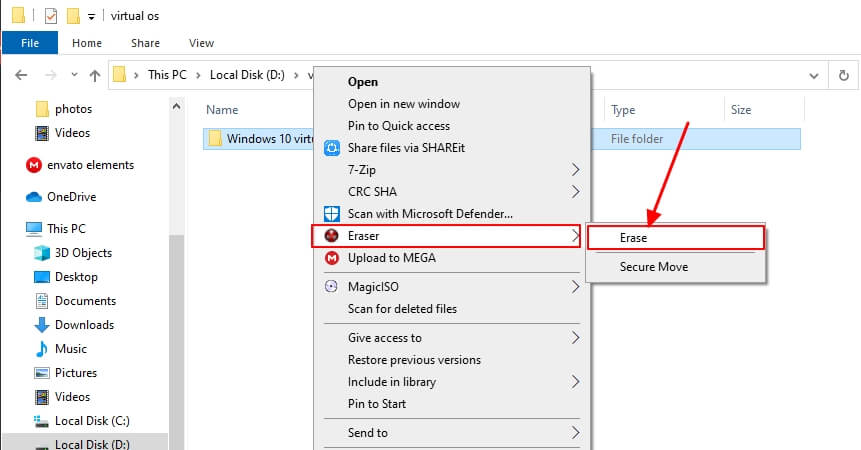
You don’t need to open eraser each and every time to remove files completely. Instead, you can just delete the file or folder you want just by right clicking on it.

You can even erase files in the recycle bin this way. What you need to do is just to right click on the file that you want to delete and select Eraser > and then Erase.
Method 02: Delete files permanently by Eraser’s Task option
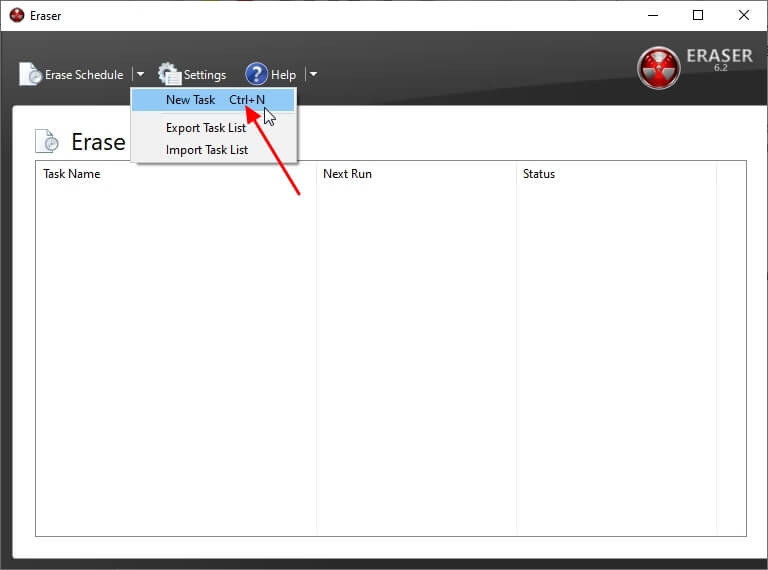
To delete files using Eraser’s Window, you have to open Eraser application from the desktop icon or use the search option in Windows.
Then, Press CTRL + N or select new task from the Erase schedule.
Eraser is so useful that it can even delete files based on how you scheduled it. Let’s say there is something you store on your computer and you want to delete it in 2 days. You can simply schedule the date when you want the file to be deleted so even you forget about it, Eraser will do the job for you.
But in the image below, I will select Run immediately. Once you select a specific method, click Add Data.
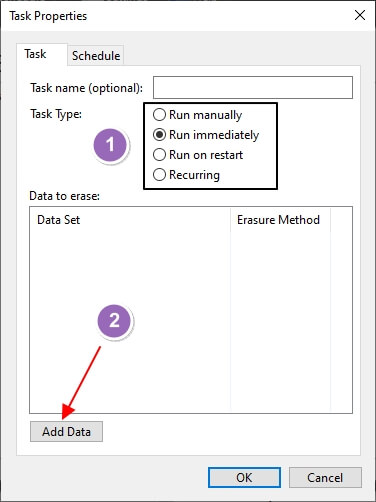
Here, you can select which data you want to delete permanently. From the Target type, choose whether you want to delete files or files inside a folder; you can also select files inside the Recycle Bin. Once you selected the target, choose the files or folder you want to delete using the browse button, then click OK. If you selected the Files in Folder option, you can keep the folder after you delete the files by unchecking the Delete the folder if empty option.
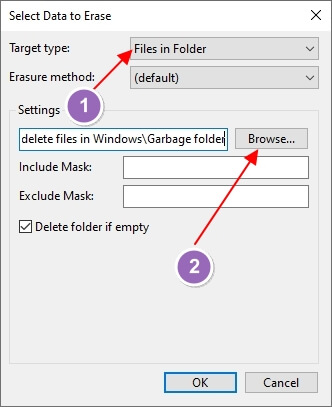
Keep the erase method as default (best method) or you can set it to US Department of Defense DoD 5220.22-M(ECE), Canadian RCMP TSSIT OPS-II, German VSITR or Schneider’s Algorithm, which are the other best erasing methods that can make the file unrecoverable. Read more
After selecting everything, click on Ok button twice to begin the process of erasing the files permanently from your computer.
If you get any error or you need to know more about how to use the Eraser software, leave a comment below so that I can provide assistance.
How to delete files from the Recycle Bin
We all know that by default, if we delete a file or a folder, it automatically moves to the Recycle Bin. And of course, if you want it gone, you have to delete it from the Recycle Bin too. That is how Windows prevents the file deletion from cases of accidental deletions. Thus, if you want to delete files completely without moving them to Recycle Bin by just one click or button, there are 3 ways:
- Disable the Recycle Bin
- Use a shortcut to delete files without moving them to recycle bin (Shift + Delete)
- Use CMD to delete files (even undeletable files)
How to use a shortcut to remove files completely
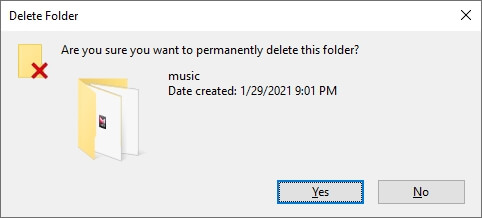
You can easily delete files from your computer without moving them to Recycle Bin. What you need to do is to select the file and press Shift + Delete buttons on your keyboard. After that, click Yes on the confirmation window. Easy, right?
How to disable the Recycle Bin
It is not recommended to disable the Recycle Bin because if you delete something accidently, you cannot retrieve it file without using a recovery software, and even the chances are low that you can actually recover the file. But, if you really want to get rid of the Recycle Bin, then follow the steps below:
Go to the Recycle Bin properties by right click on it.
Select “Don’t move files to the recycle bin. Remove files immediately when deleted” option as shown in image.
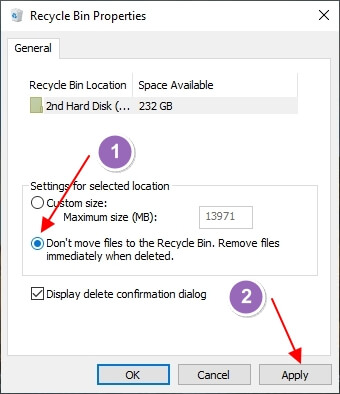
Still, I recommend to keep the “Display confirmation dialog” option so you can check if you got the correct file before deleting it.
How to delete undeletable files using Command Prompt
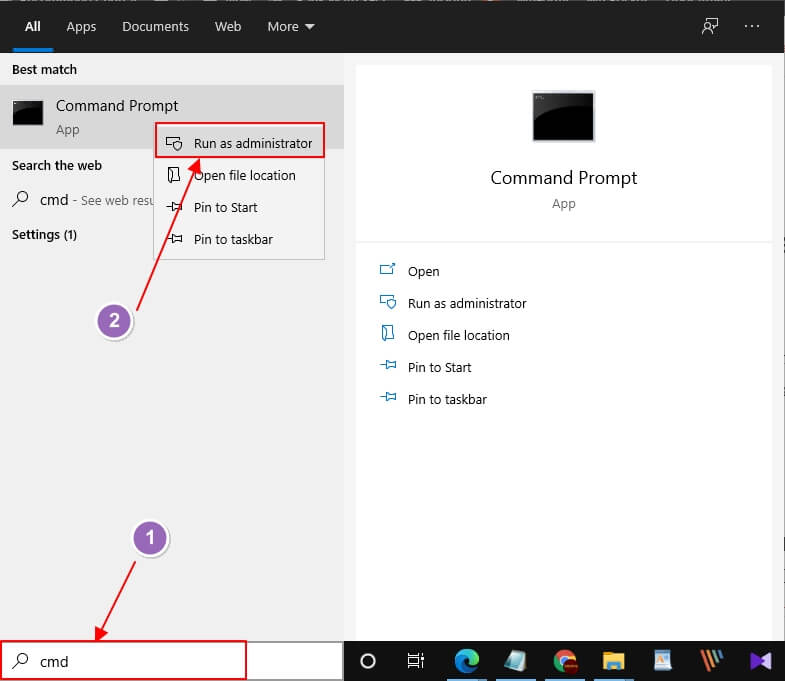
You will definitely find this very useful when you happen to delete some file and if it doesn’t work, in case something like in the image happens, open the Command Prompt in administrator mode and execute the command as given below.
DEL /F /Q Filepath
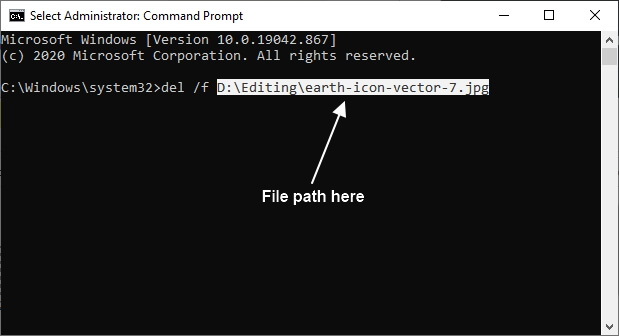
Copy the code and paste it on the Command Prompt, and then replace the “filepath” with the file’s path you want to delete. After that, press enter to execute the code and delete the file.
Take a screenshot or copy what you got. You will need this in the future.
If you have any questions regarding this article, feel free to leave a comment. I am always here to help you.
In case you delete any important files accidently, check this out!